Thursday, June 30, 2011

INSPIRATION THURSDAY


Something so pretty about a garden with straight rows, the different textures,
colors and shapes.

Have a nice day, see you
tomorrow,

Wednesday, June 29, 2011

CHIMICHURRI SAUCE RECIPE

Seems like we've been on a bit of a "sauce" kick lately.
Sauces are good, they are a super simple way of dressing up a plain dish
and pushing it to that next level.

Here is a quick and easy sauce that can also double as a marinade.  If you're not familiar with Chimichurri sauce, it's a staple in Argentinean cooking.  Argentina?  But you want to live on a farm in the country?  I know, but it's so universal, it adds a nice flavor to steak and chicken.

We first got hooked on this sauce because it is served at several restaurants here in Houston.
Of course 2nd Man had to get online and find some recipes on how to make it and over time, this is the one is one he's tweaked (and made slightly Texan) and uses now for our meals.

Chimichurri Sauce
INGREDIENTS:

1 cup Italian flat leaf parsley
2 tablespoons oregano leaves
1/4 cup fresh cilantro
1 tsp crushed red pepper
(more or less depending on level of heat you prefer)
2 garlic cloves
1 small shallot
1/4 tsp of paprika
1⁄4 cup red wine vinegar
1⁄2 cup extra virgin olive oil
Salt to taste

Simply pour all ingredients into a blender or food processor and puree until smooth.
Serve at room temperature.

Makes about 1 cup

Pour over grilled or cooked beef or chicken and use like you would any other condiment.
Or as I said, you can make it, use it to marinate the meat and then grill it.

Simple and delicious!
Enjoy!

Tuesday, June 28, 2011

BABY CHICKS - RANDOM FARM CUTENESS

Cute chicks

I just saw this online a little bit ago and thought it was cute.
Why can't they stay like this always?

Enjoy!

THE BENEFICIAL MASON BEE

Have you ever heard of mason bees?  They are not to be confused with carpenter bees, which can cause damage to wood by drilling holes in it.  Mason Bees nest in holes they find already existing in nature, for example hollow reeds.
Since they can't drill into wood like carpenter bees, they don't cause damage to furniture, decks, etc.

What you see below is an actual "bee house", pre-made and ready for these beneficial bees to live in.

It's another one of the things I plan on buying for the farm. With the honeybee population in decline, we are at risk of losing our pollinators and to have a successful garden you want good pollinators.

Mason bee house #1
They are very prolific pollinators and that's the key to any good garden, be it vegetables, flowers or fruits.  In fact, they are also called Orchard bees by some, because of their use in orchards to help farmers get the blooms on their trees.

In her short lifetime, a female can visit 60,000 blossoms as she gathers food for her young.
Below is another type of bee house, and this one is easy to make yourself.
I'll share the plans in a future post.

Mason bee house #2
Mason bees are are peaceful and non-stinging.
I do eventually want honeybees, not only for their pollinating ability, but also for their fresh honey as a byproduct.

But until then, I will get a few of these "houses", and hope to attract some mason bees to help out the pollination of the gardens and fruit trees.

Monday, June 27, 2011

A QUIET PLACE TO RELAX


The last time we were at the farm, we made a decision to put some of these......


....here in this grove of trees!


We have been trying to figure out what to do with this little area of trees (not sure what kind of trees they are, they have a whitish bark).  I believe they were deliberately planted in a semi circle, and so there is a great little area under the trees that has a great view toward the East.

We originally thought of a hammock.  Then we thought of a small table and chairs.  As we walked around, we realized that on a big piece of property like this, there are going to be lots of areas for hammocks, and we already know we have a dining area under the big mesquite tree or even other spaces.

The day we were out there, it was early morning, and we just happened to glance over and saw a beautiful morning sky and thought, how nice would it be to sit there with a cup of coffee (or in my case, hot tea) and watch the sun rise from our little grove of trees?

When we get it set up, I'll post some morning sunrise pictures!


WE HAVE PECAN TREES

Scrumptious Pecans
One thing we always knew we wanted on the farm were Pecan trees.  While growing up, I often spent Summers with my Grandparents who always had several pecan trees on their property.  They regularly produced 5 gallon buckets FULL of pecans (several buckets every year).

So the other day, I was at Wal-Mart and parked near the roped off part of the lot that they use as a garden center overflow.  I decided to wander through there on my way in, and I happened upon a section that had a sign that read,
"Fruit Tree Clearance!".

I looked, and lo and behold, there were two pecan trees!

The pecan trees
I got online while I was there (I love mobile technology) to see what the best varieties were for the Houston area.  Remember, always look for trees/veggies/flower varieties that are best suited for your part of the country, especially when purchasing at "big box" type retailers.

The two trees they had were different, one was the "Choctaw", and the other was the "Desirable".
Turns out those are two of the recommended varieties for our area.


So, needless to say, I purchased them both, originally listed at $29.98, I snagged them for $7 each!!

I'll baby them in the back yard in the city, maybe put them into bigger containers, until I can get them ready to plant at their permanent home at the farm.
And best of all, look at this:

We have pecans
They both already have pecans on them!  I will take that as a good sign.

I love finding these kinds of deals.  You just have to keep your eyes peeled!

Once I plant them in their permanent home at the farm, I'll celebrate by cooking (and then posting about)
our special pecan pie recipe, at the risk of sounding biased, it's wonderful!

Good luck!

Sunday, June 26, 2011

VINTAGE POSTER SUNDAY


They look so happy!
But I do like the message, and it reminds me to involve your children in
your gardening activities.  We need to teach children where our food
comes from and that way they can appreciate the variety.
THAT would be a victory against the "Happy Meals" of the world.

Saturday, June 25, 2011

HOW TO COOK RED CARGO RICE

2nd Man and I went out to eat with friends recently at the always delicious Cafe Chino and he had a dish that used a red rice.  We were curious about this ingredient, with it's rich, nutty flavor, and nice chewy texture.  Not to mention it was a beautiful color in the finished dish.  We asked the owner and he said it was called "Red Cargo Rice".

So, during our "day without electricity" a month or so ago, one of the places we went to cool down was 99 Ranch, an awesome new (new to Houston anyway) Asian grocery store.  And there, on the rice aisle, they had Red Cargo Rice, in a large 5 lb bag.  It is also available of course on Amazon by clicking on this link:  Red Cargo Rice.

The first thing we had to do was figure out how to cook it,  as there are no instructions on the bag itself.  Looking on the Internet, we found some instructions, but so many different ways, we decided the only way to figure it out ourselves was trial and error.

Like brown rice, red cargo rice takes longer to cook than regular white rice.  You can put not enough liquid or the opposite, too much liquid.  Here is what we came up with.  Quite simply, it's a 2 to 1 ratio (water to rice) and 45 mins of cook time.


Here is the bag, the name just what it's called, "Red Cargo Rice".


We like jars (more on that in a future posting) and so the very first thing I did was empty the bag into a large "biscuit jar".  It fit perfectly.


Like other similar rices, it requires washing.  Just rinse in a colander in the sink and the make sure it is well drained before you cook it.  


Put oil in the bottom of a pan to cover it (here about 3 TBSP) and heat on medium heat.  Add the rice to the hot oil and stir it around with just a little salt and pepper.  Saute lightly for 3 to 5 minutes
(this really brings out the flavor and color).


Add your water (or you can use 1/2 water and 1/2 broth), in the 2:1 ratio.  Here, we have 1 cup of rice and two cups of liquid
(1 cup water and 1 cup chicken broth).


Bring to a boil, then reduce to simmer or your lowest setting, put the lid on it and leave it alone for 40 minutes.  No peeking, no checking, just let it sit with the lid on.  At the end of 40 minutes, turn off the heat and let stand with the lid still on, for 5 minutes more. 

Don't be tempted to open and stir or check on it, it will do its thing all by itself.

Here it is after the lid is removed, all the water has absorbed and the rice is cooked.  Let it sit for a few minutes to let any remaining water finish absorbing.

And here it is in it's rich, nutty, deliciousness!  We often make this with fresh chopped green onions on top, maybe even some herbs, but the flavor of the rice should be the star though.  Enjoy!

Friday, June 24, 2011

CAN O WORMS

I KNOW, probably grosses a lot of you out.  Worms?  On PURPOSE?

Let me tell you, my Grandfather in Oklahoma (whom I would spend summers with) grew some of the best vegetables I have ever seen in my life.  His secret?  He had worm "beds", cinder block raised beds that he layered with compost and food and of course, worms.  They produced a rich, black soil
(he called it 'black gold') that he put on his garden and it truly made a night and day difference.

SO, flash forward to us beginning to have a farm and make plans and guess what?
A worm bed is on my short list.

Yesterday, I found this:

It's a product called "Can O' Worms".  Above is an exploded view, showing how there are multiple levels and layers.


Here is a an exploded diagram, that shows more of what each level is for.

They are available pretty much all over online shopping sites.
Just Google Search "can o worms" and you'll find it for sale at
several places.  It ranges from $65-$100, depending on what you get with it and of course
which location you go to.

There are homemade versions, but this product seems to have great reviews at most places, so I think it's a worthwhile try.

UPDATE:  I found a video demonstration!  You can view it by visiting our
YouTube channel by clicking HERE.

I'll keep you posted once we go on this part of the adventure!

THE AMAZING ORCHARD RACK

I stumbled across these the other day quite by accident but oh my gosh, we SO want one of them for the mudroom/pantry at the farm!
Since we want to use the Gorm shelving from Ikea for the design in that room, this will look like it's a part of that, as it seems to be made of the same style and color wood as the Gorm shelves.
3 Drawer Orchard Rack


6 Drawer Orchard Rack


9 Drawer Orchard Rack
They come in three different sizes, as shown above.  They are all the same width and depth, about 24" square, and they come in heights of
24", 39" and 55".

Not very long ago, people stored their crops like potatoes, onions, squash, apples, etc on racks like this one. The open design of this makes sure there is good air circulation and the cool thing is they slide out for easy access.  The website suggests putting it in a cool, dark place (best for your veggies), and as our mudroom/pantry does not have windows, it's the perfect spot.

These are exclusive to Gardener's Supply Company 
(a great catalog by the way).  Items such as this, I like to keep on my radar, just in case they sell out, or quit making them.  As for size, I think we are leaning toward the biggest one, after all, we hope to have a large garden and will be producing a lot of veggies for cooking, canning, and giving away.

UPDATE 09/2011: I recently received the 9 drawer orchard rack and I plan to put it together soon.  We just left it in the box to make it easier to carry out there.  As soon as I get it assembled, I'll take lots of pics and give a review as we use it.  Can't wait to put it in its new home.


UPDATE 11/2011: You can CLICK HERE to see the final product, built and in it's place in the mudroom.

Thursday, June 23, 2011

INSPIRATION THURSDAY


I've always liked the look of large stones in a garden, surrounded by flowers.  We have no large stones like this on the property but I bet we could find some and bring them in!  It's just a very natural look.

Have a great day and see you back here tomorrow.

Wednesday, June 22, 2011

IT'S RAINING IT'S POURING

Check this out!


We have RAIN!  For those who don't know, this part of the country
has been in a pretty severe drought for several months.

In fact, last time I heard, we were over 24 inches BEHIND normal
rainfall for this time of year.

I'm not sure how much we will get today but I hope it's at least a few inches.

UPDATE:  RAIN TOTALS - 1.33" in the city and 2.14" at the farm

Tuesday, June 21, 2011

ROMESCO SAUCE RECIPE

This sauce is another one of our favorites.  It is called Romesco and originates in Spain.  Is has been said that fishermen originated it to serve as a sauce with seafood, but it's delicious with all types of dishes, meat, pasta, veggies, it's even great spread over a loaf of rustic bread.
There are many many variations, but they all have the same basic ingredients, bread, peppers, nuts, tomatoes, and garlic.
We try to make it at least once a month, and just eat it with whatever we happen to be eating for dinner when we make it.

Spanish Romesco Sauce
INGREDIENTS:

1/2 cup olive oil
1 slice of stale, crusty bread, torn into pieces
6 garlic cloves, chopped
1 1/2 tsp salt
1/2 cup of blanched almonds or hazelnuts
1 8-oz jar of roasted red peppers
1 15-oz can of crushed tomatoes with juice
1 Tbsp smoked paprika
3 Tbsp sherry vinegar or red wine vinegar

Preheat oven to 350 degrees.  Heat olive oil in a skillet over medium-high heat.  When the oil is hot, saute the bread and almonds, stirring often until they begin to brown.  Add the garlic and saute a few more minutes.  Remove from heat.
Pour all into a food processor or blender, and add remaining ingredients, and puree untilsmooth.  Here comes the odd step.  Spread it out on a rimmed baking sheet, and bake in the oven for 10-15 minutes until the edges just start to caramelize.    Yep, baking it this way adds a depth of flavor that really puts it over the top in taste.

Take out of the oven and scrape it off the sheet and into a container.


Just use it like any similar type of sauce or even pesto.


It's good!
Enjoy!

SUMMER IS HERE


Well, it's here!  Although for us down here in the South it seems like it started
about 2 months ago.

But now it's official, June 21st is the first day of Summer.

HAVE A GREAT SUMMER WHEREVER YOU ARE!
AND STAY COOL IF YOU CAN!


Monday, June 20, 2011

NO COMPUTER ACCESS


      I had no computer access yesterday (Sunday) so I wasn't able to blog or get some postings ready for today. 
We are short staffed at work this morning, so I'm not sure how much I'll be able to do from here, but I will try to get some postings up later!

Saturday, June 18, 2011

VINTAGE POSTER VICTORY GARDENING

Wow, they even dressed up to gather vegetables!
I don't think I'll be this dressed up, but he looks like
he's having fun while "digging for victory" and really, that's all that matters.

THE REALLY COOL AND DELICIOUS ZEPHYR SQUASH

Have you seen this squash?
It's pretty cool, I hadn't heard of it, but the other day, we were at 
Hubbell and Hudson and they had this squash.  I love the look of it.


We bought some, and brought it home.  2nd Man cooked it very simply, sliced, and sauteed lightly in some butter, just to test it's flavor without other flavors overpowering it.  It's a slightly nutty squash, very tasty, firm, and downright delicious.  I really wouldn't think it's much different than a regular yellow squash, and could even substitute for a zucchini in a pinch.  Anything you can do with regular squash, you could do with this.

One thing I'm doing, and have been doing, is to create a list of the vegetables we want to grow at the farm.  I'll share that list later on, but I've definitely added this wonderful vegetable to it.
It's considered a Summer squash,
has an open growth habit making it easy to harvest,
and is supposed to be very prolific.
I can't wait to grow these.  It might even be fun to try to can them somehow.
And I'm sure 2nd Man can fry it, saute it, steam it, casserole it, bake it and otherwise cook it into something great.
I'm sure experimenting will be half the fun!

Friday, June 17, 2011

RED CHICKEN COOP DREAMING

How cool are all these chicken coops?

Red Coop 1
This one above looks like a smaller version of the barn I posted the other day, and then the one below is a homemade project that someone did a great job on.

Red Coop 2
What brought this up is the other night, when I was looking at the red barn, I mentioned the chicken coop that was next to it to 2nd Man and he said "well look them up online".
So I did some research and found all sorts of cool designs for 
chicken coops that look like they were inspired by the classic, large, red barns.

Red Coop 3
Some of these are pre-built by different manufacturers and some are 
really neat, homemade jobs.  They look so cool and would be neat on our 
property, somewhere near the barn.

Red Coop 4
The one above is all enclosed, kind of a nice touch to keep the chickens all in one spot.

Red Coop 5
I like this one with the enclosed side yard.  I think some combination of this with our barn, at a future date of course, would be a nice touch.

Red Coop 6
This is so pretty, in the wide open space, but I'm afraid that the Hawks that circle the property on occasion, might like the "all you can pick up buffet" this might provide,
but it's still beautiful with the green grass and blue sky.  

As I said, we can't have chickens right away, but we do want them at some point, especially as we become more self sufficient.  Not for meat, I couldn't bring myself to do that, but eggs, absolutely, we'll definitely have chickens that can provide us with all the eggs we will ever need.

5000 THANKS


Sometime over the last few hours, we hit a milestone.
We have had 5000 visits/page views to our blog!

I can't thank you all enough.  When I started this journey I never knew if we'd attract people to the blog but sure enough, we have, we are, and it just keeps going.

So, we give our 5000 thanks, to each of you for visiting and sharing this journey with us.
I know I've said it before but I'll say it again, it's been a great ride so far,
and I truly think the best is yet to come!

Thursday, June 16, 2011

INSPIRATION THURSDAY


Isn't this pretty?  I think I could just sit in the grass and look
at something like that all day long.


So peaceful...

More tomorrow!

Wednesday, June 15, 2011

RED BARN DREAMING

OK, so we don't have it yet (no, this isn't ours), but we have done our research and I believe we have narrowed down the storage shed/barn we want.  I guess it's not really a true barn, since we won't have livestock in it, but it will serve the same purpose.  It's this one, by Tuff Shed.
Red Tuff Shed Barn
We love this look of a "classic" barn as seen in the photo above.
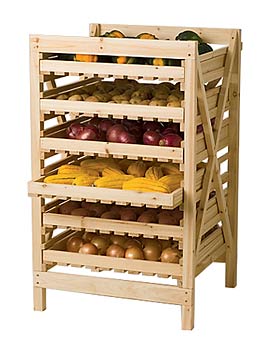
A place to store tools, supplies, and all things farm related.
I know it's easy to let one of these turn into an overstuff storage building, but with us keeping our house in the city for awhile, we can keep 'overflow' there and start this out clean,
fresh and most of all, organized.

We are fortunate, these can be purchased in kit form and then you pay to have someone build it.  The husband of one my dearest friends ("separated at birth", you know who you are!) used to build these for a living.  He still does it as a side business and when we get ready, we won't even think of having anyone else do it for us, he'll be the one we call.  Not sure we'll do that in the heat of this Summer, I wouldn't put anyone through that.  This will most likely be a Fall project for sure.

Ours will be painted red with white trim, just like the one above.
The same red we use on the house trim, and the same white as the body of the house.  I think the opposite color scheme will be a nice touch.  Of course, we have to figure out the best placement for it, and I think we've narrowed it down to a couple of sites on the property.  We want it close enough to the house to have easy access but far enough away that it becomes it's own "area" on the property.  There are many interior options available, so I like the ability to configure them to whatever way works best.
\
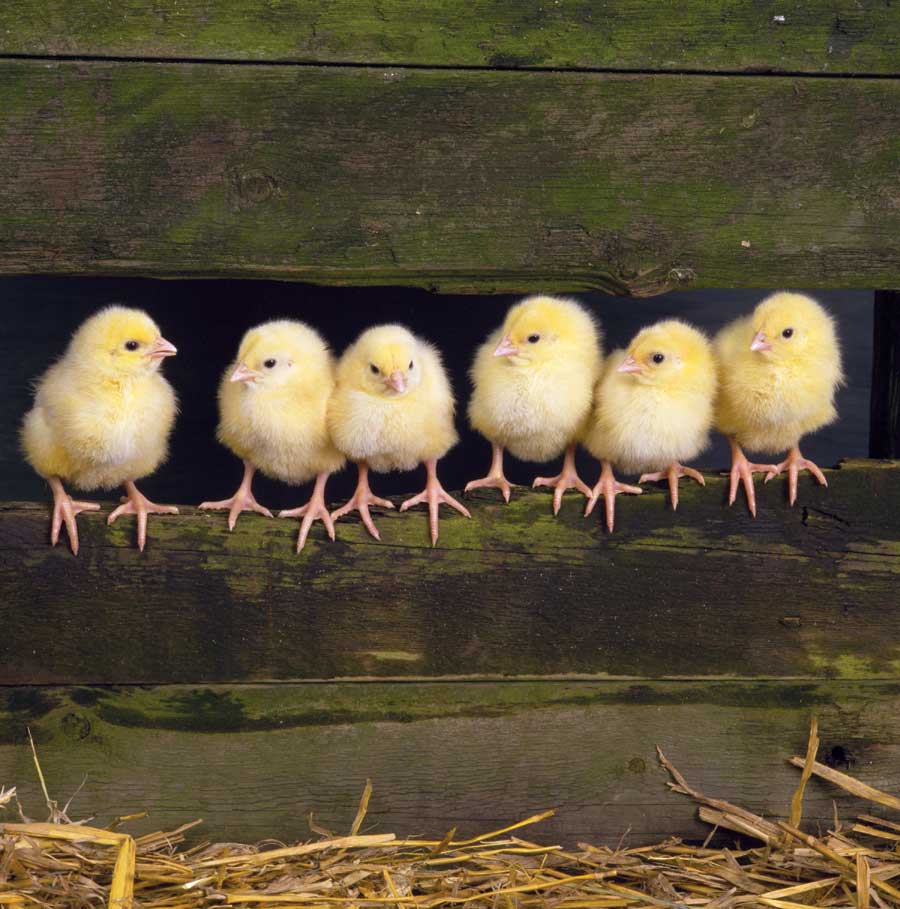
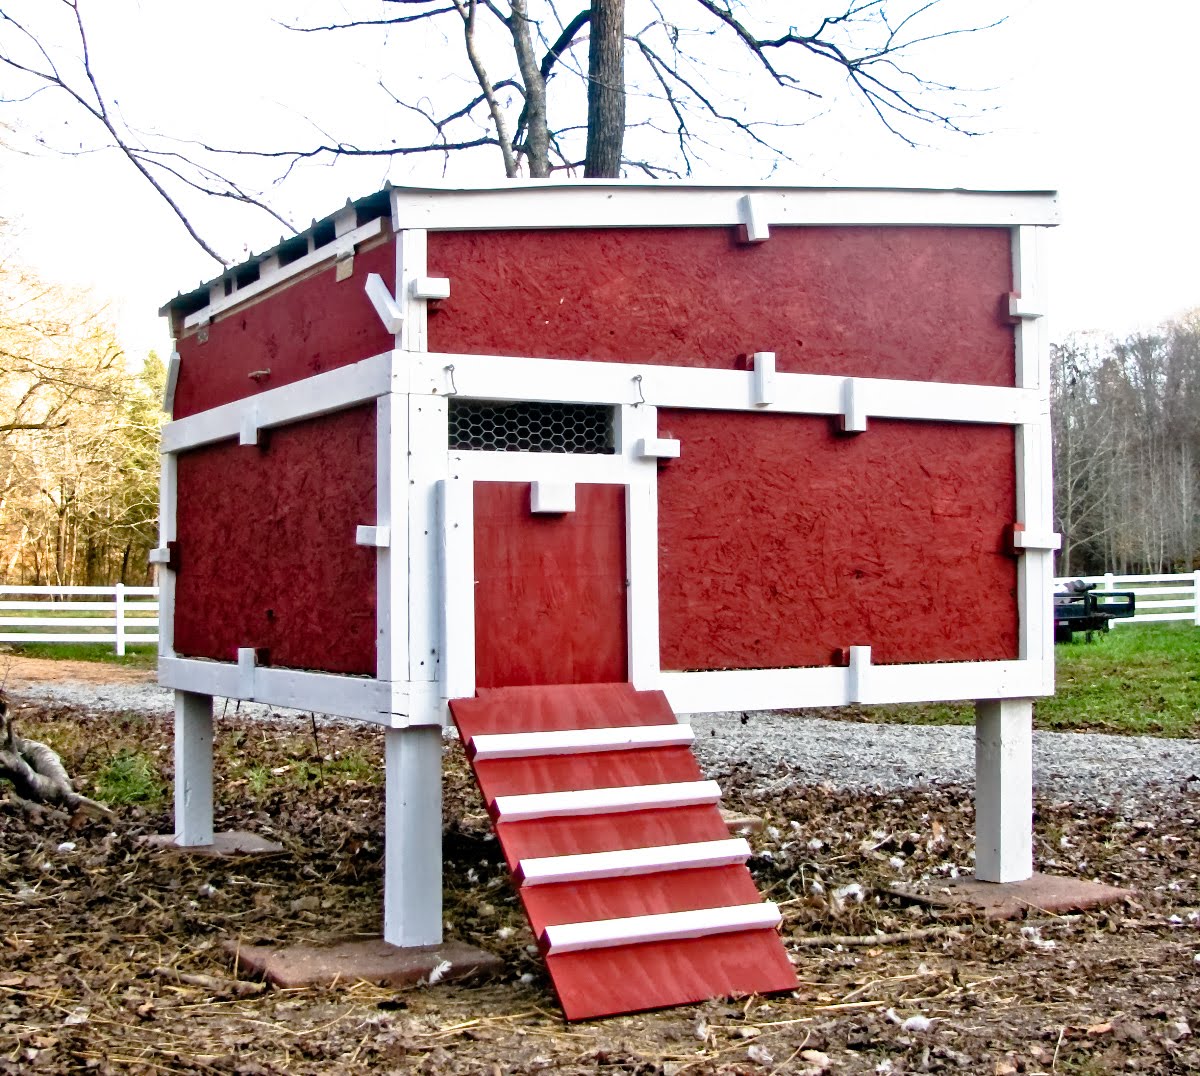
Side note, I just LOVE the chicken coop next to the barn in that picture.  We can't have chickens in the foreseeable future, since we won't be full timers yet, but it reminds me that we (and you) should always plan ahead for future expansion.  If we wedged this in between two trees, and then someday decided to have chickens, we'd have to house them elsewhere, when it would be more convenient for them to be near the barn.  So always think about your future plans for your property, even if it's a year or two or three down the road, you'll save yourself a lot of headache in the long run.

Planning ahead is always a good thing.

INGREDIENT ESSENTIALS - SWEET HERBS & SPICES

I decided on this entry to not just focus on one thing, because there is really no SINGLE herb or spice that you must have, quite simply you need to have a variety.  I would say however that this is a list of essential spices that you should have in your pantry to use in your baking and dessert cooking. 
Previously, I covered the essential herbs for cooking savory dishes. 

In no particular order they are:
  • CINNAMON- This ubiquitous spice is essential in all types of pies and cookies.
  • VANILLA - In all forms, it's used in virtually all desserts.  Vanilla extract is the most common form, and you can actually make that yourself, I'll have a "how to" on that coming soon.
  • NUTMEG - A whole nutmeg is best so that you can grind it as you need it.
  • CLOVES - Ground is most commonly used in desserts, but often, whole cloves are used in a simmering style dessert to add flavor, and then are removed at the last minute.
  • GINGER - An unusual spice, very pungent but necessary for Gingerbread and other similar desserts and breads.
  • SUGAR - Goes without saying that it's essential, you can't make anything sweet without it. Sugar comes in many varieties, white, powdered, dark, light, cane, etc, and it's good to have a variety.
  • ALLSPICE - Used in cookies and cakes and breads, adds an unusual taste to pies.

It's interesting, all of these seasonings are used interchangeably in sweet and savory dishes.  Whereas the savory spices are rarely used in desserts, these are very commonly used in dinners.  Nutmeg goes well with seafood dishes, and I've often put a tiny pinch of cinnamon in my meatloaf. 

The key to using them like this is to use a very small amount, just to add a little extra "hmm, what is that?" to your dish.  Also, when using them in your desserts, they are often not used to "taste", like, for example, salt/pepper.  If a recipe calls for one teaspoon, don't use two or three.  These seasonings are meant to be used in moderation so that they don't overpower your dish.

I remember reading an article once that said you can experiment in cooking dinner and don't have to be precise with amounts, but in baking and desserts, always follow the directions.
Good rule to live by I suppose.

Happy Cooking!


Tuesday, June 14, 2011

OUR NEW FAVORITE WINE VINHO VERDE

Since this blog is all things "farm", one of those things we enjoy is a nice glass of wine.  Now let me emphasize, we are not the 'wine types' that can identify the different notes (scents and tastes) in a particular wine.  My usual response is "oh it tastes like a field a bluebonnets with kittens and puppies and rainbows" which usually elicits a laugh or two. 

In the most recent issue of Country Living (thanks Kelly) they recommended a great deal for a bottle of wine.  It's a Portuguese wine called Vinho Verde.


For their recommendation, they suggested the Famega (on the left).  We were at the store and I saw this Gazela (on the right) and since it was also the same Portuguese variety, we decided to pick it up.  WOW, it's our new favorite hot summer wine (and trust me, it's hot down here now, 104 a few days ago).  Anyway, we put it in the freezer for a couple of hours to get it ice cold (don't leave too long in the freezer, the low alcohol content will cause it to freeze).  We opened it, poured it into a wine glass and it actually had bubbles!  Not like Champagne or anything else "sparkling", it's just a very light kind of bubble, just enough to stick to the sides of the glass but not enough that it's going to fizz up and overflow if you shook it.  I can't describe the taste with all the official terms, I'm just going to describe it as REALLY GOOD.  It's the perfect wine for hot days, and one interesting feature is its low alcohol content, only about 9%, which means you can have an extra glass!  It's slightly sweet, light on the palate, and best served when really cold, hence the reason it's so good on a hot summer day.  Another advantage?  It's only about $6.00 a bottle!


We kept ours in the refrigerator for a couple of days after it was opened, and it might have lost just a slight bit of it's natural fizz, but it didn't lose any taste.  Of course, it's so good, it rarely lasts longer enough for us to keep it long enough to worry about that, ha.
The other day we finally found the Famega brand and so we tried it.  It was a bit stronger, but not really to our liking.  It seemed a bit "heavier".  It's funny how the same wine from the same grapes but different wineries can be so different in taste.

Both are made with the Loureiro grape shown below.

Loureiro Grapes
For our personal preference, we will stick with the Gazela as our "house summer wine"
(or is that "farmhouse summer wine"?).

SIDE NOTE:  We've been firm believers that it's fun to try new wines, that way you can find what you like, and then once you find one you like, you can use it as your house red, or white or whatever it is you like.
In our mud room, we want to get one of those small refrigerated wine coolers that holds both reds and whites, keeping them at the appropriate temperatures.  More on that when it happens!